
Rhino Pro (Supreme) All Metal RH504MC Instruction ManualUpdated 5 months ago
Rhino Pro (Supreme) All Metal RH504MC Instruction Manual
Initial Setup
Download and Print the Manual
View the Rhino Pro Vending Machine Line
View the Full Rhino Vending Machine Line
Changing Wheels or Wheel Settings
- Unlock and open the globe lid by unscrewing the lock.
- Remove the four (4) screws holding the globe to the hopper.
- Remove the candy brush plate from the hopper.

- Lift the adjuster plate and move it to the desired wheel setting notch. Notch #1 (far left) is for the smallest vends, while Notch #6 is for the largest vends. The adjuster plate may be removed completely when vending larger products such as peanut M&M's.
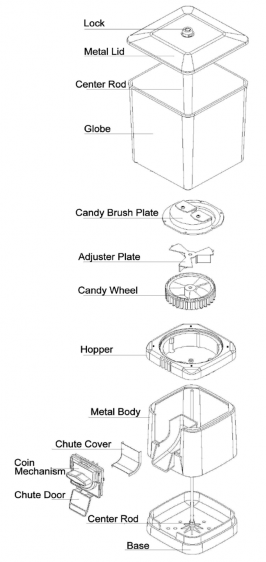
Figure 1
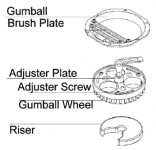
- For gumballs, capsules, or bouncy balls, use the gumball wheel and brush plate. Install the riser first, ensuring the opening faces the front of the vendor. Install the gumball wheel so that one vending hole aligns with the riser opening. Then install the gumball brush plate.
- Loosen the adjustment screw located on top of the gumball wheel next to each ball cavity. Adjust the opening size according to the product being vended. The springs on the brush plate must face the coin mechanism (front of the vendor).
Once the desired vend size is achieved, fill the machine with product, replace the lid, and reinstall the lock.
Important: Do not overtighten the lock. A snug fit is all that is required.
Figure 2 – Pan Candy Wheel
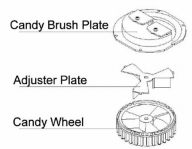
Figure 3 – Gumball Wheel
Coin Mechanism
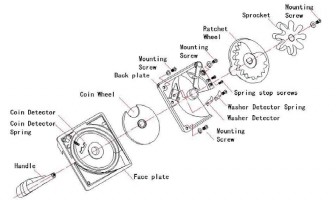
The coin mechanism can be removed by removing the globe lid and lifting off the globe assembly. Once the globe assembly is removed, the coin mechanism can be lifted upward and removed.
To Dismantle the Coin Mechanism
- Remove the center screw.
- Remove the sprocket.
- Remove the three (3) mounting screws.
- Pull the back plate away from the face plate.
- Remove the jammed coin.
- Reassemble by reversing the above steps.
Note: The exploded-view illustration is provided for maintenance and adjustment purposes only. Coin mechanism parts are not sold separately.
Coin Retrieval
- Unlock and open the globe lid by unscrewing the lock.
- Lift the globe assembly and place it on a secure surface.
- Retrieve coins from the base.
- Replace the globe assembly.
- Reinstall the lock.
Important: Do not overtighten the lock. A snug fit is sufficient.
Heavy Duty Cast Iron Stand
The Heavy Duty Cast Iron Stand consists of three main components:
- Base
- Threaded Pipe
- Threaded Flange
Single Mount Installation
- Thread the pipe into the pedestal base and tighten.
- Place the threaded flange onto the pipe with the flat side facing up.
- Tighten the flange by turning clockwise.
- Unscrew the lock, remove the metal lid, lift off the top assembly, and remove the coin mechanism. The base is now exposed for mounting.
- Align the holes in the vendor base with the large holes in the threaded flange.
Note: The front of the base contains a notch for the product chute. - Insert two bolts through the threaded flange and vendor base.
- Apply washers and nuts and tighten securely. Do not overtighten.

- Reassemble the vendor.
Important: Overtightening can damage the base.
Double Mount Installation
- Complete the Single Mount installation steps.
- Position the large double bracket on top and align its holes with the threaded flange.
- Insert the mounting bolts.
- Disassemble both vendors to expose the bases.
- Align the front and rear mounting holes in each base with the outer holes of the double bracket.
Note: The front of each base contains a notch for the product chute. - Insert two bolts per vendor through the double bracket.
- Install washers and nuts and tighten carefully.
- Reassemble both vendors.
Warning: Overtightening can crack the base and void the warranty.